
When working with Python, one of the most critical aspects of effective development is managing your project environments. Virtual environments isolate dependencies, ensuring projects don’t conflict. They make your code reproducible, portable, and safer to shar
In this guide, i’ll break down what Python environments are, why they’re crucial, and how you can create and manage them seamlessly. And don’t worry—I’ll keep the jargon to a minimum and sprinkle in practical examples to make everything crystal clear.
What is a Python Environment?
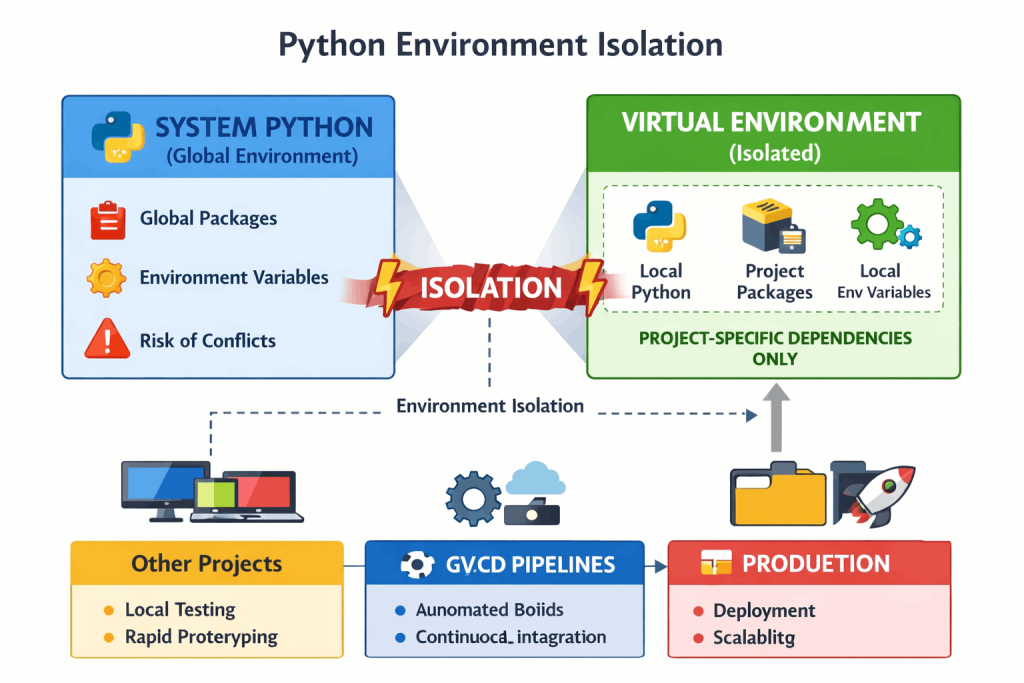
A Python environment is a self-contained workspace that holds everything your Python project needs to run — including the Python interpreter, installed packages, and sometimes system variables.
Think of it as a sandbox: it keeps your project’s dependencies isolated so they don’t interfere with other projects or your system’s global Python installation.
Key Components
- Interpreter: The specific Python version (e.g., 3.10, 3.11) your code runs on.
- Libraries/Dependencies: Packages installed via
pip,conda, orpoetry. - Environment Variables: Configuration values that affect runtime behavior.
Why It’s Important
| Benefit | Description |
|---|---|
| Isolation | Prevents conflicts between different projects’ dependencies. |
| Reproducibility | Ensures consistent behavior across machines and deployments. |
| Portability | Makes it easy to share or deploy your project anywhere. |
| Safety | Keeps your system Python clean and stable. |
Create and Manage Python Environments
Let’s dive into the practical part! We’ll explore multiple tools and methods.
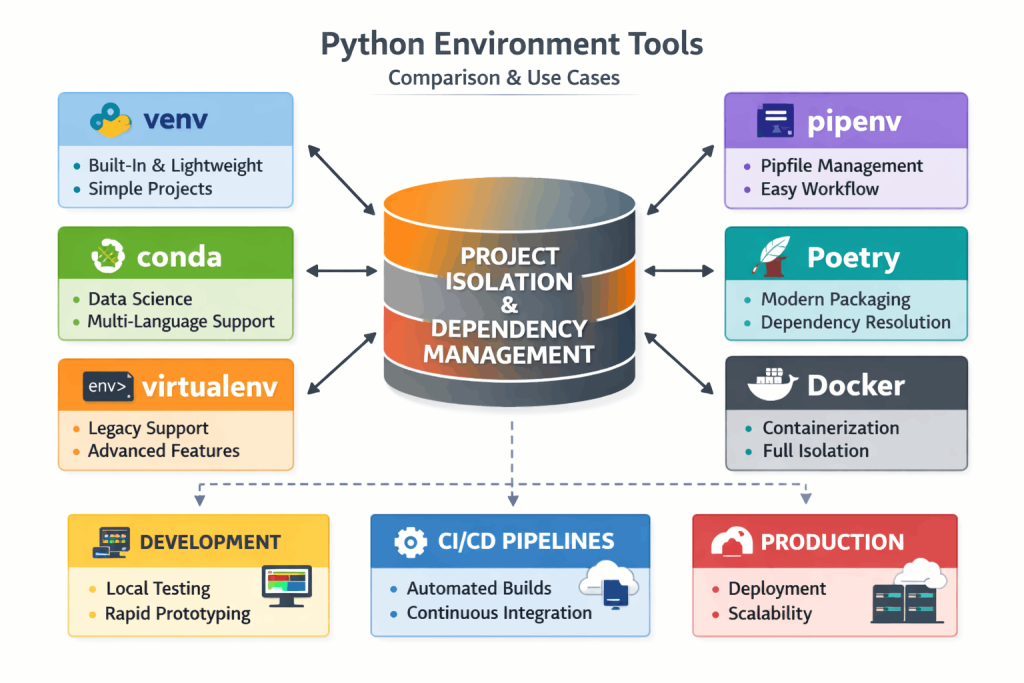
1. Using venv (Built-In)
The venv module comes with Python 3.3 and later, so you don’t need to install anything extra. Here’s how to use it:
- Create a Virtual Environment:
python3 -m venv myenvThis creates a directory calledmyenvcontaining a fresh Python setup. - Activate the Environment:
- On macOS/Linux:
source myenv/bin/activate - On Windows:
myenv\Scripts\activate
- On macOS/Linux:
- Install Dependencies:
pip install requestsThis installs therequestslibrary only within the environment. - Deactivate the Environment:
deactivate
# Create a virtual environment
python -m venv myenv

# Activate it
source myenv/bin/activate   # macOS/Linux
myenv\Scripts\activate      # Windows

# Install packages inside it
pip install requests

# Deactivate it
deactivate
2. Using virtualenv
virtualenv is an older tool but still widely used because it offers more features and works with older Python versions.
- Install
virtualenv:pip install virtualenv - Create a Virtual Environment:
virtualenv myenv - Activate and Use: The activation and usage steps are the same as with
venv.
# install virtualenv
pip install virtualenv

# Create a virtual environment
virtualenv myenv # myenv is the name of virtual environment
# virtualenv -p python3.10 myenv # specify a Python version if you have multiple installed

# Activate it
source myenv/bin/activate   # macOS/Linux
myenv\Scripts\activate      # Windows

# Install packages inside it
pip install requests

# Deactivate it
deactivate
3. Using conda (For Data Science)
If you’re in the data science world, you’ve probably heard of Conda. It’s not just for Python but can manage other languages and libraries, too.
- Create a Conda Environment:
conda create --name myenv python=3.9This creates an environment with Python 3.9. - Activate the Environment:
conda activate myenv - Install Packages:
conda install numpy pandas - Deactivate the Environment:
conda deactivate
4. Using pipenv (Pip Meets Virtualenv)
pipenv combines pip and virtualenv for a streamlined workflow.
- Install
pipenv:pip install pipenv - Create an Environment and Install Dependencies:
pipenv install requestsThis creates a virtual environment and installsrequests. - Activate the Environment:
pipenv shell - Generate a Lock File:
pipenv lockThePipfile.lockensures reproducibility by locking dependency versions.
Managing Multiple Environments
Listing Environments
- With
conda:conda env list - With
pipenv:pipenv --venv
Removing an Environment
- With
venvorvirtualenv: Simply delete the folder:rm -rf myenv - With
conda:conda remove --name myenv --all - With
pipenv:pipenv --rm
Sharing Environments
When you’re collaborating, it’s essential to share your environment setup. Here’s how:
1. Requirements File (pip)
Generate a list of dependencies:
pip freeze > requirements.txt
Recreate the environment elsewhere:
pip install -r requirements.txt
2. Pipfile (pipenv)
Share your Pipfile and Pipfile.lock. Others can run:
pipenv install
3. environment.yml (conda)
Export the environment:
conda env export > environment.yml
Recreate it:
conda env create -f environment.yml
Best Practices for Managing Environments
- Use One Environment Per Project: Keep things isolated.
- Pin Dependency Versions: Lock versions to avoid surprises.
- Document Your Environment: Always share a
requirements.txt,Pipfile, orenvironment.yml. - Clean Up Regularly: Remove unused environments to save space.
- Automate Setup: Use scripts or CI pipelines to recreate environments effortlessly.
Conclusion
Python environments are your secret weapon for maintaining sanity in your projects. Whether you’re using venv, virtualenv, conda, or pipenv, the key is consistency and isolation. Start small, experiment with these tools, and find the workflow that suits your needs.
By mastering environments, you’ll not only streamline your development but also make your projects more robust and reproducible. So go ahead—create your first environment today and experience the difference!


